| I'd like to be able to dish out circular areas with a continuous gentle curve. There are lots of methods one might use to accomplish such a thing:
In the past I have tried to approximate a larger radius to the curve by adjusting the height of the bit in combination with the radius of the circle jig. It's difficult to do this with any accuracy, and I ended up having to go over it with a gouge to knock down the high spots and then do a lot of sanding. |
|
|
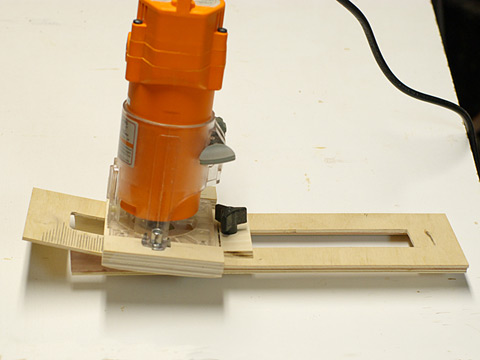
But what if the circle jig had a curved ramp that took care of the height setting? The key is that the router must have a convex subbase which allows it to follow the curve, which I shaped freehand at the edge sander. A trim router has a much smaller footprint that makes this much more practical. I am using the el cheapo Harbor Freight model. |

|
The problem with my construction method was that the 1/8" plywood bent over the ramps springs back and causes it to not sit flat. But between the weight of the router and a little hand pressure it's workable. It really needs to be machined as one piece though which is a problem for another day. Note the highly ergonomic t-nuts used as knobs, I didn't have any small knobs that wouldn't interfere with the router. |
|
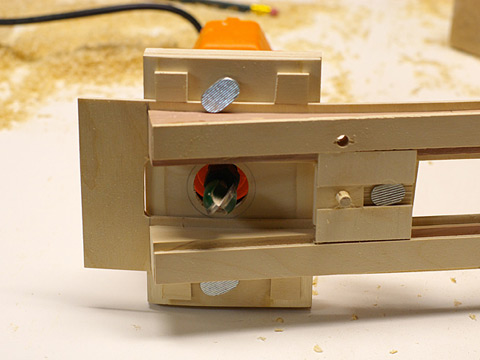
The pivot point is adjustable, and offset from the locking knob which allows it to be under the router to get close to the center and to keep the locking knob on the flat part of the jig. After this first test was done I made one with more of an offset. The bit is a 3/4" diameter core box. |

|
Because the router doesn't have a plunge action first I start with the knobs snug but not tight, which allows the router to be slid along the ramp but maintain it's orientation. If it's too loose you'll be in trouble. Then I back up to where the bit is just below the surface and make a pass around. |
|
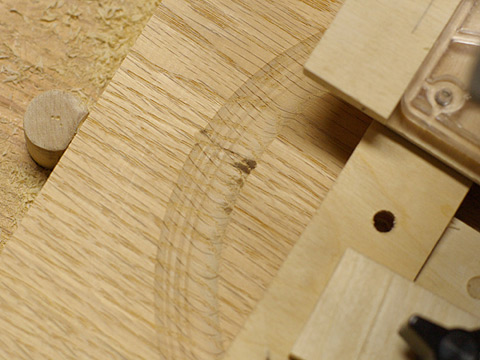
Going back to where I made the plunge cut each time, I moved the router in about 3/32 each pass. I made about 5 passes or so until I was around 1/8" deep and the trim router was starting to become unhappy. Putting the power cord over your shoulder makes this much easier. |
|
Then I switch to the full size router with a normal circle jig and a 3/4" straight bit to hog out some material. This is also a good time to untwist the power cord on the trim router. |

|
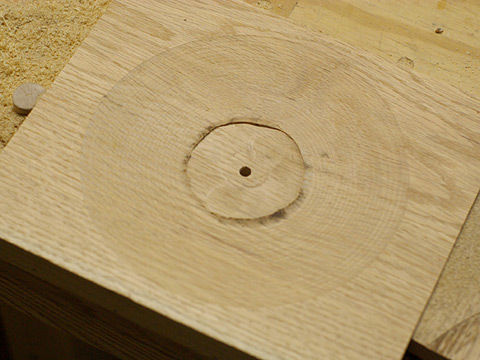
The process was repeated until I got down to the minimum radius my circle jig for the full size router could do. There were 22 passes with the trim router, and I think 3 with the big router. Which sounds like a lot, but each pass doesn't take very long. It's rather tedious though. |
|
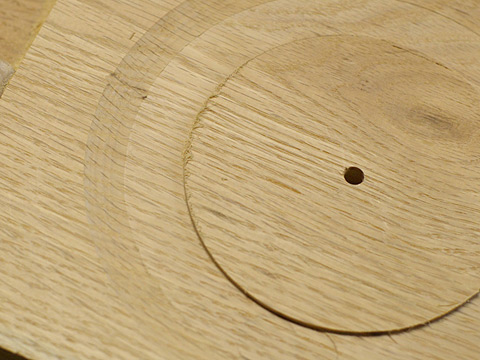
I removed the rest of the waste freehand with the big router and an extended base. The center hole is only a through hole because I started on the other side of this piece of scrap and there was *ahem* a bit of a learning curve. |
|
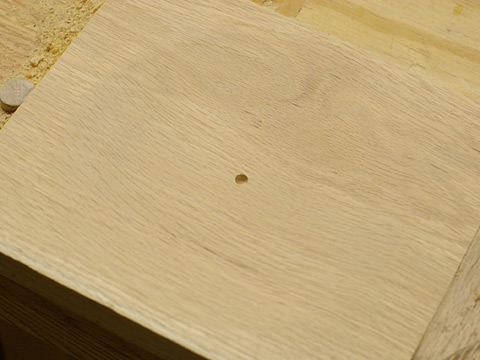
It really didn't need that much sanding, I got a little carried away with the power sanding and lost the crisp edge. Comnbined with my flat overhead lighting on the bench it doesn't look like much of anything, but trust me it's there! |